
Georgetown artists can hardly wait to take their clay projects home! They began their projects in December, oh so long ago….and have been patiently waiting (well, sort of patiently) for their projects to dry, be bisque fired, glazed, and fired again. And of course we have to display them for just a bit so friends and teachers can admire their creations. Soon my friends…we will wrap these treasures up and send them home.
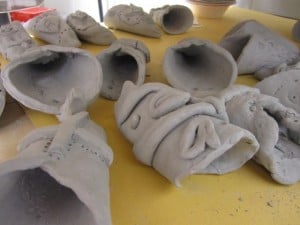
Elf houses, wall pockets, and bowls…ready to load in the kiln.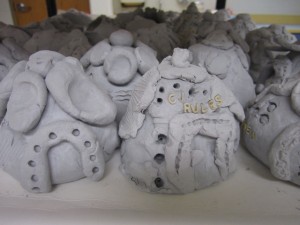
Fourth Grade wall pockets – adding beads and wire for hanging.


 Searching for just the right beads.
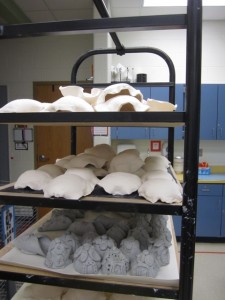
Fifth grade Chihuly bowls and Third grade Elf Houses.


Second grade Texture Houses – a new project, and my favorite so far!


Dear Ms. Brouwer,
You must know how much I appreciate you posting these wonderful projects you do in your class. I must tell you I often borrow them to use in my classes. Without your ideas, we’d be very dull.
Thank you, thank you, thank you.
Aww, thank you Ann! Borrow away…glad you are able to use some of our projects!
Just came across your website recently, and I adore it! LOVE the 2nd grade textured clay houses. Would you explain the basic directions? Thank you!
Hi Elizabeth, and thanks for visiting. Let’s see….I think I gave everyone 1/2 to 3/4 pound of clay, and they used wood dowels to roll the clay out slightly larger than the house template that they were to trace around. The templates were made of laminated tagboard and fairly small – 3″x4″ with a triangle roof on top. The hardest part was getting the kids to not roll out their clay too thin, or their houses would break when they were dry; the big focus was to roll them out so the template just fit on their clay piece. This project was all about texture – the kids used noodles, wire screens, and lots of other objects to make texture on their houses. We used alphabet noodles for house numbers, which the kids loved! They used their clay scraps to practice and explore the textures they could make; some kiddos also used scraps to add details to their houses. After firing the pieces, instead of glazing them, we used crayons to color the houses and brushed over them with black tempera so the texture showed. I did have to use a stiff brush to rub some of the black paint off under running water so the color could show through. We glued the houses to little triangle cardboard stands for display. Hope this helps a bit! The project took 2-50 minute classes to create the houses and add texture, and another 50 minute class to add the color. I think I sprayed them with gloss spray for extra shine too.