My third graders finished up a very cool project this week that tied into their recent weaving project. We read a Nigerian folk tale called “Why the Sky is Far Away” and created portraits of the king in the folk tale, the Great Oba.
Here are the beautiful results – each one is stunning!



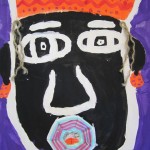
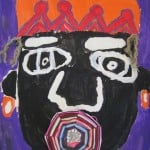
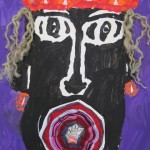
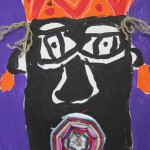
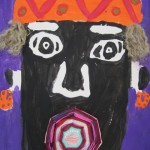
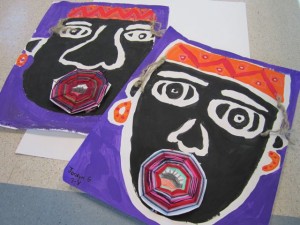
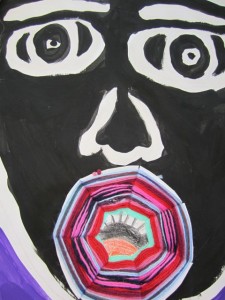

First, Your website is wonderful! I love all the art especially how you incorporate literature into your work and inspiration. Question: Do you actually weave the mouth of the G RE AT OBA? If so, how? thanks again.
Thanks Kasey! I sent you a longer email with more info – but the short answer is yes, they wove the “Oba Mouths” around a paper plate loom. Very easy, and the kids absolutely loved doing the weaving. They are still asking to weave, and we finished the Obas 3 weeks ago!
This is a great project! Did you paint on white paper? Did you paint it black first then the white outline? Or did you do the white outline then black around?
Thanks Jessica – – white outline and black around! We drew the face with a yellow crayon and then painted over our crayon lines with white tempera paint, making a nice thick line. The next class we painted black tempera up to the white lines. Kind of a reverse way to paint – it threw some of the kids until they figured out how it worked!
Awesome Project!!! Wondering if you would be willing to share a few specifics?
Wondering the overall size of the finished project and the finished size of the mouth?
did the kids cut the plates themselves or did you do that in advance?
What size plates did you use?
What was your purpose in reverse painting? Just wondering if it would work for the kids to start with black paper and just paint the white lines with acrylic?
Did you create the mouth first or the painting first?
Thanks so much for sharing!!!
Hi Rachael – thank you – this was a fun project for my kiddos. Let’s see…
> paper size was 20×24 or 22×28, can’t remember which.
> I cut the plates in advance – wanted the kids to focus on learning to weave and not get all frustrated with cutting the plates correctly.
> regular size paper plates – not the little dessert ones. Finished size of the weaving was about 6 or 8 inches – kids cut the extra ends off that were unwoven. I let them decide how big to make their weaving – some wanted to go bigger, others were done sooner. When they were done weaving, I showed them how to create the inside of the mouth, which was their first clue to what was coming next!
> reverse painting – I really just wanted to show the kids a different technique for painting and get them thinking about a portrait in a new way. Black paper/white lines would work well – I didn’t have black paper to work with or I might have gone that route too.
> we did the weaving first – I wanted the kids to have the “mouth” done so they could plan their portrait around it. They set the weaving on their paper and drew the rest of the face and features around it.
Good luck, let me know how your project turns out! j.
Thank you so much for your post ! We are studying Africa, and I love the idea of incorporating a mix-media folklore lesson. Do you mind if I ask for a more detailed idea of the painting and weaving steps so that I could execute this with my class? Thank you!
Hi Sam – thanks for visiting our blog! This was a fun lesson for my kids. If you check the comments below the original post, you’ll see that I’ve included several responses detailing the painting steps, and if you follow the link in the post about the weaving, it will take you to a post that shows the paper plate weaving as well. I hope you are able to try this project with your students!
I love this artwork, and would love to learn about the weaving, and step by step directions. The art is wonderful!
Hi Laura – thanks for your comment, this was a fun project for my third graders. The weaving is created by using a paper plate for a loom; more specifics about the project are included in the comments for this post if you scroll down and check those. Here’s a picture of the paper plate weaving in progress; I think the picture explains how it is done…just cut pie-shapes in a 9″ paper plate, leaving a 3″ to 4″ non-cut area in the center (so the paper plate doesn’t fall apart)! We just started weaving in the center and taped our yarn to the back of the plate to secure it. Here’s the link to the weaving in progress: http://josettebrouwer.edublogs.org/2011/02/03/new-weaving-projects/